Navigation
Home → Current guide → Next guide: setting up remote login
Setting up the Raspberry Pi
Hello papi.
The first step is to set up the Raspberry Pi. I will call this the RPi.
The Rpi is, itself, a desktop computer.
You can read more about it on the product page. In terms of the desktop computer, it has these features:
- 1.4GHz processor
- 512GB RAM
- Wireless LAN and Bluetooth
- HDMI output
- 1 x USB port
- Micro SD card slot
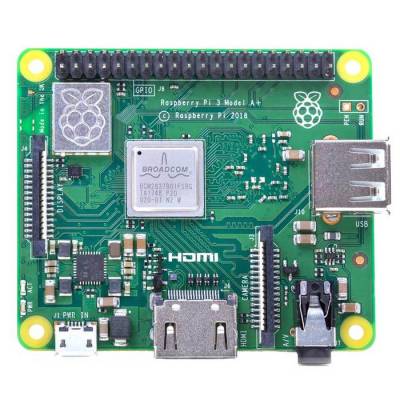
Step 1: Examine the RPi
Examine the RPi. Note two things.
First, find the Micro SD slot. You can remove the card and insert it again (it has no buttons or tabs; just pull out and push in).
Second, what makes the Raspberry Pi special is that it has a 40-pin general input-output (GPIO) header.
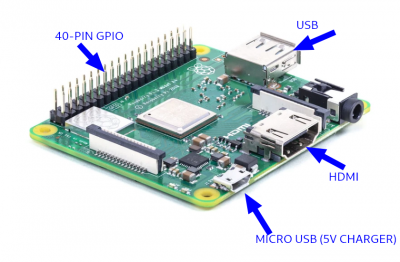
These pins allow the RPi to interface with many devices like sensors, screens, etc. You can buy sensor to measure water content, https://thepihut.com/products/dht22-temperature-and-humidity-sensor, temperature, etc. and do many experiments using these pins. You can then write code in order to interface with these pins.
Step 2: Connect to a monitor and mouse/keyboard
Once you have set up the computer, the easiest way is to use your iPad/home PC and log into the the Raspberry Pi over the WiFi network. However, it is possible to attach a monitor and keyboard/mouse to first get started.
Power
First, plug a 5V USB charger into the micro-USB slot. The best charger you can use will be 5V with 2.5A output. However, it is OK to use smaller amperage (I use a phone USB charger).
Monitor
Plug an HDMI monitor into the HDMI slot.
Keyboard/Mouse
If you have a keyboard/mouse that operates from a single USB slot, you can use this. If you do not have this, then you can use:
- USB hub to plug in more than 1 port
- Temporarily plug in a mouse or keyboard when you need it
It is not a big deal if you do not have the ability to plug in both keyboard and mouse because in the future you will prefer to access the Raspberry Pi by remote PC/iPad login. I will show you how to do this in the next guide.
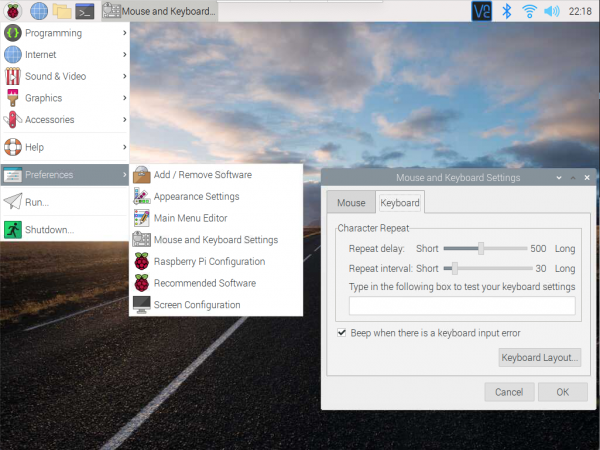
Note: I may have set up the keyboard for UK keyboard. I cannot remember. If this is a problem, go to Preferences → Mouse and Keyboard Settings → Keyboard → Keyboard Layout and change to US model.
Step 3: Start the Raspberry Pi
Once you plug the RPi into power, it will automatically turn on. There is no on/off switch.
If you need a login, your login is:
user name: pi
password: m*t*ho**71
I will not write the password here but you can figure it out.
Step 4: Connect the raspberry pi to the internet
Play with the raspberry pi and connect it to the home wifi network.
You can play with this system. It is just a Linux system.

Extra notes
Papi, I have set up the Raspberry Pi for you so that you do not have to install any operating system. However, you may like to learn yourself how to set up the Raspberry Pi operating system. To do this, you can format your own MicroSD card with the software and install.